


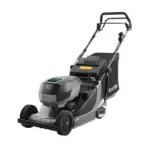

 Harrier 41 PRO 60V Self Propelled Battery Lawn Mower
RRP: £1,049.00 You Save: £100.00
Our Free White Glove Service is available on this Machine. Assembled, oiled, fully tested and ready to go. We’re only able to deliver this item locally to ensure top-quality service. Learn more >
Live stock from our warehouse
Description
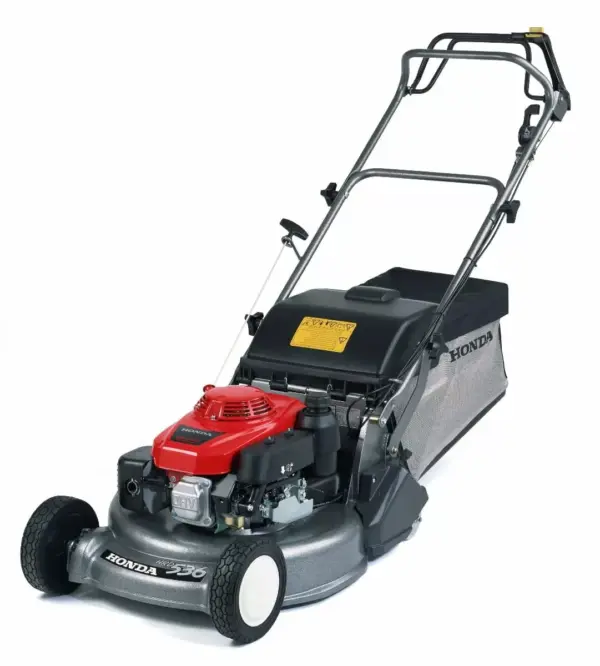
Get professional results with our new cordless rear-roller commercial-grade Harrier Pro 60v lawnmower, specially designed for landscape contractors.
With a narrow 41cm cutter deck made of strong aluminium and steel, split rear-roller, the Harrier 41 PRO 60v can easily maintain gardens looking for that “Hayter Stripe” finish while handling being taken in and out of a work vehicle multiple times a day. Tackle the entire job with Toro’s range of Revolution 60v garden tools that are compatible with the same 60v battery.
- Create perfectly sharp stripes with the integrated ribbed rear roller, for effortless mowing with great results
- Let the mower do all the work. The Power Boost technology maximises run-time by providing more power only when needed
- Set the power at the highest setting for event tougher conditions
- Enjoy a cordless mowing experience with no compromise on power with the high-performing Brushless DC motor
- Easy to use height-of-cut lever. Choose between seven different heights (13 – 60mm) for your desired grass length
- Vari-Pitch™ cutting technology automatically adjusts the cutter deck to increase airflow when set to cut longer grass
- Front bumper provides protection for the deck and wheels
- Rear carry handle aids transport by providing a suitable contact-point for lifting the mower
- Large capacity grassbag stands on end when full
Specifications
| Cutting Width | 41 cm |
|---|---|
| Cutting Height Min | 13 mm |
| Cutting Height Max | 60 mm |
| Cutting Height Positions | 7 |
| Side Discharge | No |
| Rear Discharge | Yes |
| Grass Collection | Yes |
| Grass Box Capacity | 70 L |
| Max Lawn Area | 300 m² |
|---|---|
| Power Source | Battery |
| Drive Speed | 2.8 mph (Standard) 3.2mph (Boost) |
| Starter Mechanism | Electric Start |
| Vibration Levels | 0.8 m/s² |
|---|
| Commercial Warranty (T&C's Apply) | 2 Years |
|---|
| Weight | 40 kg |
|---|
| Rear Discharge | Yes |
|---|---|
| Side Discharge | No |
| Battery Included | No |
| Mower Type | Roller Rotary |
| User Type | Professional |
Hayter
Reviews
Hayter Warranty
Where can I find my warranty information on my product?
For information regarding Hayter’s warranty on your product’s warranty coverage, please refer to the Warranty section in your Operator’s Manual.
What does my warranty cover?
Hayter promises to repair any Hayter consumer product at no charge if there is a defect in materials or workmanship of the unit. The warranty period varies from product to product.
How long is the coverage?
Toro U.K. Limited promises to repair any Hayter consumer product at no charge if there is a defect in materials or workmanship of the unit. The warranty period varies from product to product.
Does the Lawnmower have to be Serviced to maintain the warranty coverage?
To qualify for the multi-year warranty, you must have the machine serviced annually by an Authorised Hayter Service Dealer.
Does my Lawnmower have a Lifetime Crankshaft Warranty?
All Hayter branded machines that are fitted with a genuine Hayter Friction Disc and Crank-Safe Blade Brake Clutch (integrated Blade Brake Clutch (BBC) + Friction Disc assembly) as original equipment and used by the original purchaser in accordance with recommended operating and maintenance procedures, are covered by a Lifetime Warranty against engine crankshaft bending. Machines fitted with friction washers, Blade Brake Clutch (BBC) units and other such devices are not covered by the Lifetime Crankshaft Warranty.
Hayter Battery Lawn Mower Maintenance
Maintenance
Remove the safety key and battery pack from the machine before performing maintenance or cleaning.
Use only the manufacturer’s recommended replacement parts and accessories.
Inspect and maintain the machine regularly. Have the machine repaired only by an Authorised Service Dealer.
Lubricating the Machine
You do not need to lubricate the machine; all the bearings have been lubricated at the factory for the life of the machine.
Replacing the Blade
Service Interval: Yearly
Important: You will need a torque wrench to install the blade properly. If you do not have a torque wrench or are uncomfortable performing this procedure, contact an Authorised Service Dealer.
If the blade is damaged or cracked, replace it immediately. If the blade edge is dull or nicked, have it sharpened and balanced, or replace it.
WARNING: When servicing the blade, be aware that the blade can still move even though the power source is off. The blade is sharp; contacting the blade can result in serious personal injury. Wear gloves when servicing the blade.
- Remove the safety key and battery pack from the machine.
- Use a block of wood to hold the blade steady.
- Remove the blade, saving all mounting hardware.
- Install the new blade, washer, and blade bolt.
Storage
Important: Store the machine, battery pack, and charger only in temperatures that are within the appropriate range; refer to Specifications.
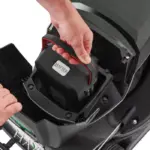
Important: If you are storing the battery pack for the off-season, charge it until 2 or 3 LED indicators turn green on the battery. Do not store a fully charged or fully depleted battery. When you are ready to use the machine again, charge the battery pack until the left indicator light turns green on the charger or all 4 LED indicators turn green on the battery.
Disconnect the product from the power supply (i.e, remove the battery pack and safety key) and check for damage after use.
- Do not store the machine or charger with the battery pack installed
- Clean all foreign material from the product.
- When not in use, store the machine, safety key, battery pack, and battery charger out of the reach of children.
- Keep the machine, battery pack, and battery charger away from corrosive agents, such as garden chemicals and de-icing salts.
- To reduce the risk of serious personal injury, do not store the battery pack outside or in vehicles.
- Tighten all fasteners.
- Store the machine, battery pack, and battery charger in an enclosed, clean, dry area.